Wikipedia:Graphics Lab/Resources/Optimizing shaded relief using GIMP (old)
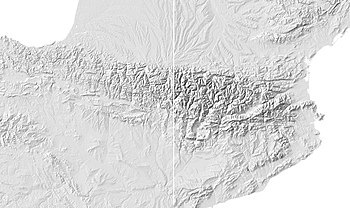
This tutorial's aim is to optimize relief shadows of previously created shaded reliefs using digital elevation model (DEM) files and the programs 3DEM or GRASS GIS.

Composite: In many cases, a single illumination source is inadequate for showing the main forms of a relief, particularly if the relief features are oriented North-West - South-East in the axis of the main light source. In order to improve the result, it is possible to displace the virtual Sun across the map and create three views which will be assembled together to produce a composite shadow image of the map in question.

Bumping: This page proposes a second optimization which could be applied to general maps covering a country. Where, on a large scale map such as those resulting from the files of the Shuttle Radar Topography Mission (SRTM) at their native resolution, each detail of the relief is clearly visible and useful. In the other hand, more general map don't need the level of precision of the SRTM, but raher the principal forms which are of more interest.
The tools
editReinforcing density and Composite
editTranslator's note: All illustrations from this point onwards are screenshots from the original author's French language version of GIMP
Reinforce
edit- 1. Open the Shadows_315.png (or .bmp) image in GIMP. Create a duplicate layer and select <Multiply> mode to reinforce the density of the shadows resulting from this main illumination.
Composite
edit- 2. Open as a layer (CTRL + ALT + O) the image Shadows_275, change its fusion mode to <Multiply> in the drop down Mode menu in the Layers, Channels, Paths window, and add a black mask (Layers > Mask > Add a layer mask).
- 3. Zoom to 200% (View > Zoom > 200%). Select the fuzzy circle Paintbrush tool, with a scale of around 7 pixels and, on the mask layer, paint in white along the lines of the shadows of the main relief forms which are oriented North-South, in order to heighten the contrast of these lines.
| Heighten the contrast of the North-South lines of relief | Appearance of the mask layer for <Shadows_275> |
- 4. Repeat points 2 and 3 for the image Shadows_355 in order to increase the contrast of the East-West lines. Take care not to reinforce the shadows on two flanks of the same mountain.
- 5. Save the image in .xcf format to preserve the layers in case it is necessary to modify them later. Export the image as a .png format file in order to be able to use it as a layer above your map. You may need to increase the contrast by using the Curves tool (CTRL + M) - do not use the Luminosity-Contrast tool as this does not allow for a precise control of the operation.
- Note: A simpler and more rapid solution is to add the layers with a Multiply fusion without adding a black mask, but this method is not very effective at optimizing the relief forms.
Bumping: Reduction of the level of detail
editNote: This optimization applies to small scale maps covering a large terrestrial and mountainous zone for which the excess of details obscures the reading of the general relief forms.
- 1. In GIMP, open the png shaded relief image previously created. Note its dimensions in pixels. Go to Image ->Scale and size of the image... Specify a new size in <percent> and indicate a value of 20%.
- 2. Resize the image again, this time with a value of <500%>, and check that the dimension indicated in pixels does correspond to the size of the original image. These operations have the effect of diminishing the details and to make the smallest valleys less visible. Save the image under a different name to the image source. Close the document.
| Resizing to the original size | Appearance of the map after the operation |
- 3. Open the original image of the shaded relief. Open as a layer (CTRL + ALT + O) the modified map which has just been created in point 2 and give it a transparence of around 50%, the aim being to obtain an image of the shadows which does not appear blurred but in which the smallest details will be hardly visible on the final map in order to optimize the general llines of the relief. Increase the contrast if necessary by using the Curves tool (CTRL + M).
| Fusion of the two layers | Comparison of the original map / optimized map |
External links
edit- Bumping (reducing relief detail)
- Shadedrelief.com: Tutorial giving further details of this technique.
- Relief practices
- Reliefshading.com: A site presenting the rules for graphics in cartography and which deals with the question of relief shadows.
- GRASS GIS: A Useful Tool for the Mountain Cartographer includes a grass script which allows one to generate a shaded relief of a lat-long DEM while taking into account the horizontal (E-W) stretching which normally makes lat-long reliefs unusable. What this does is allow the relief image for this tutorial to be produced in a single step rather then 3.
Notes
edit
Sources
edit| This page contains a translation of Wikipédia:Atelier graphique/Didacticiels cartographiques/Didacticiel d'optimisation des ombres du relief from fr.wikipedia. |
Links
editThe table above has links to various tutorials and resources which can help in the creation of Wikipedia maps from digital georeferenced data (GIS).